Master the Flaky Crust: Your Guide to Perfect Homemade Apple Pie
Few desserts evoke the warmth of home and tradition quite like a classic apple pie. More than just a simple sweet, it’s a symbol of comfort, gathering, and the pure joy of sharing something truly special. The aroma of cinnamon and baked apples wafting from the oven is an invitation in itself, promising a treat that combines the nostalgic charm of a bygone era with the satisfaction of a truly homemade creation. This comprehensive guide will walk you through every step of crafting an apple pie that boasts a tender, spiced filling nestled within a golden, flaky crust – a dessert so perfect, it will undoubtedly become a cherished family favorite. Forget store-bought shortcuts; mastering this
easy homemade apple pie recipe is a culinary journey well worth taking.
The Heart of the Matter: Why Homemade Apple Pie Reigns Supreme
In a world full of convenient options, taking the time to bake an apple pie from scratch offers unparalleled rewards. It’s an act of love, a connection to culinary heritage, and an opportunity to create something truly bespoke. A homemade apple pie allows you to control every element, from the quality and balance of the spices to the specific blend of apples, ensuring a flavor profile that perfectly suits your palate. You can adjust the sweetness, guarantee a crisp, non-soggy crust, and relish in the knowledge that every bite is the result of your care and effort. Whether it's for a holiday feast, a comforting weekend dessert, or just to make an ordinary day feel a little more extraordinary, the satisfaction of presenting a perfect, golden-brown pie is immense.
Deconstructing the Perfect Apple Pie: Essential Ingredients Explained
Understanding the role of each ingredient is the first step toward mastering any recipe, and the humble apple pie is no exception. Each component plays a critical part in achieving that iconic balance of textures and flavors.
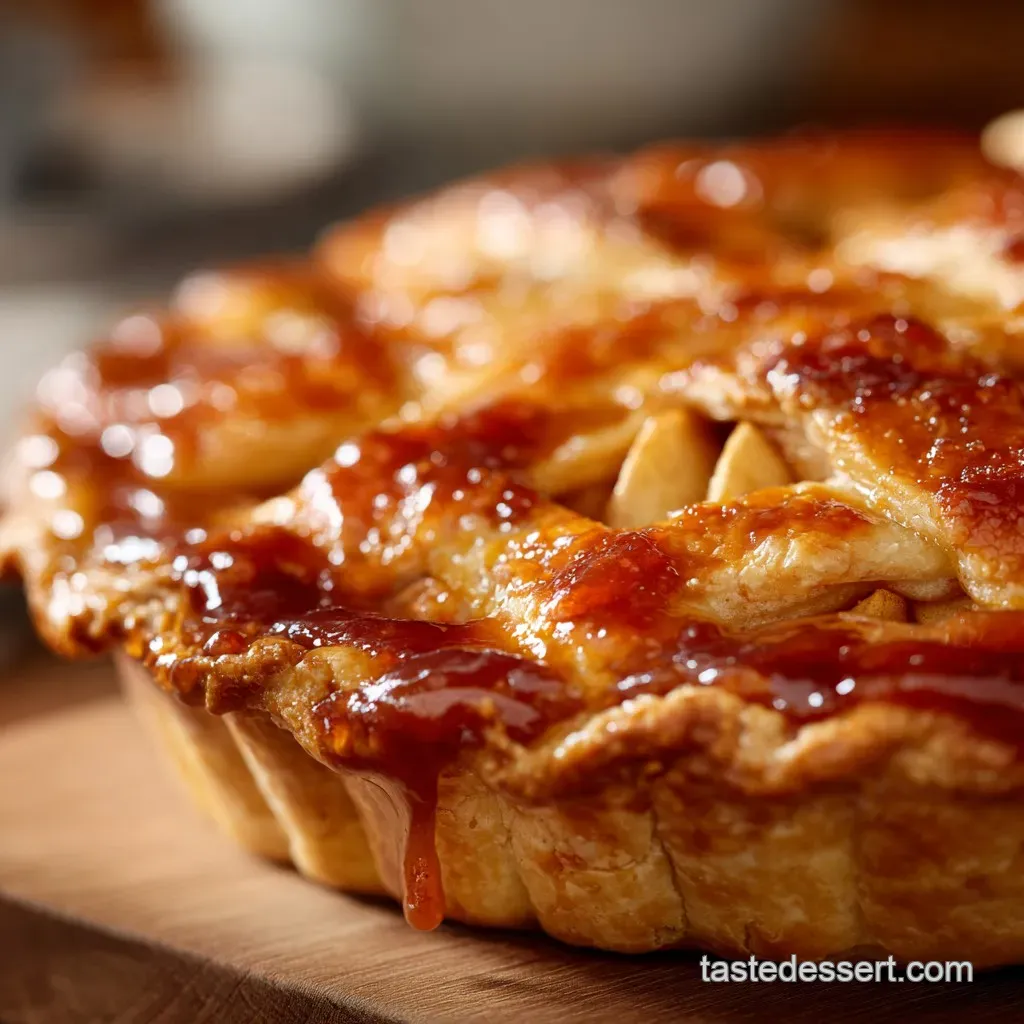
The Foundation: A Flaky, Tender Crust
The crust isn't just a container; it's an integral part of the pie's appeal. A truly exceptional crust is flaky, tender, and melts in your mouth, providing the perfect counterpoint to the sweet-tart filling.
*
All-Purpose Flour: This provides the primary structure for your crust. The gluten in flour, when hydrated and developed through mixing, creates elasticity, allowing the dough to be rolled and shaped without tearing. However, too much gluten development (from overworking the dough) leads to a tough crust, so moderation is key.
*
Salt: While a small amount, salt is crucial for enhancing the flavor of the crust, preventing it from tasting bland. It also subtly helps to control gluten development.
*
Cold Fat (Shortening or Unsalted Butter): This is the secret to flakiness. As the cold fat pieces within the dough melt during baking, they release steam, which separates the layers of flour, creating those desirable flaky strata.
*
Shortening tends to yield a very tender, flaky, and structurally stable crust.
*
Unsalted butter offers superior flavor but requires more careful handling as it has a lower melting point. Many bakers find a blend of both provides the best of both worlds: flakiness from shortening, flavor from butter.
*
Ice-Cold Water: Absolutely critical for preventing the fat from melting prematurely and for inhibiting excessive gluten formation. Using cold water ensures the fat remains in distinct pieces, leading to a flakier crust. Some pro tips even suggest adding a splash of apple cider vinegar or vodka to the water; the acid in vinegar helps tenderize the gluten, while vodka's alcohol evaporates quickly, reducing the amount of water absorbed by the flour, which also contributes to tenderness.
The Star: Flavorful Apple Filling
The filling is where the pie gets its name and much of its character. A good filling should be robustly flavored, sweet yet tart, and never mushy.
*
Apples: The undeniable star! Selecting the right apples is paramount to avoiding a bland or
mushy apple pie. Tart, firm apples that hold their shape well during baking are ideal. Excellent choices include:
*
Granny Smith: Classic, tart, and firm.
*
Braeburn: Sweet-tart with a crisp texture.
*
Honeycrisp: Exceptionally crisp and sweet, but can be pricey.
*
Fuji or Golden Delicious: Milder sweetness, good texture.
* A combination of two or three varieties often yields the most complex and balanced flavor profile, with varying textures.
*
Granulated Sugar (and sometimes Brown Sugar): Sweetens the pie and helps draw out the natural juices from the apples, creating a luscious, syrupy sauce. The amount can be adjusted based on the tartness of your chosen apples and your personal preference. Brown sugar adds a deeper, caramel-like note.
*
Thickener (All-Purpose Flour or Cornstarch): Essential for thickening the apple juices released during baking, preventing a watery or runny filling. Flour provides a slightly cloudier, more opaque sauce, while cornstarch yields a clearer, glossier finish.
*
Warm Spices (Cinnamon, Nutmeg, Cloves, Allspice): These aromatic spices are the soul of apple pie, adding warmth, depth, and that unmistakable comforting fragrance. Cinnamon is non-negotiable, but a pinch of nutmeg, cloves, or allspice can elevate the flavor significantly.
*
Lemon Juice: A splash of fresh lemon juice brightens the flavors of the apples and helps prevent them from browning, keeping their fresh appearance.
*
Unsalted Butter (for filling): Dotting the top of the apple filling with small pieces of butter before adding the top crust adds richness and helps create a more luscious, glossy, and flavorful sauce as it melts into the apples.
Crafting Your Masterpiece: A Step-by-Step Guide to the Best Apple Pie Recipe
Even if it's your first time, making a homemade apple pie from scratch is incredibly rewarding. Follow these steps for success.
Mastering the Dough: Secrets to a Flaky Crust
The journey to a perfect apple pie begins with the crust.
- Combine Dry Ingredients: In a large bowl, whisk together the flour and salt.
- Cut in Cold Fat: Add your cold, cubed shortening or butter (or both) to the flour mixture. Using a pastry blender, two knives, or your fingertips, cut the fat into the flour until the mixture resembles coarse meal with some pea-sized or lima bean-sized pieces of fat still visible. These larger pieces are key to flakiness. Work quickly to keep the fat cold.
- Add Ice Water Gradually: Add the ice-cold water, one tablespoon at a time, mixing lightly with a fork after each addition. Only add enough water until the dough just comes together when pinched; it should be moist but not sticky. Avoid over-mixing.
- Form and Chill: Gently gather the dough into a ball. Divide it in half and flatten each half into a disc (like a hamburger patty). Wrap each disc tightly in plastic wrap and chill in the refrigerator for at least 30 minutes, or up to 2 days. Chilling allows the gluten to relax, makes the dough easier to roll, and hardens the fat for maximum flakiness.
Perfecting the Filling: Sweet, Spiced, and Never Mushy
While the dough chills, prepare your delicious apple filling.
- Prepare Apples: Peel, core, and slice your chosen apples into even pieces, about ¼ to ½ inch thick. Even slices ensure even cooking.
- Combine Filling Ingredients: In a large bowl, toss the sliced apples with sugar (granulated, brown, or a mix), thickener (flour or cornstarch), lemon juice, and your preferred spices (cinnamon, nutmeg, etc.).
- Let Macerate (Optional but Recommended): For a more flavorful, syrupy filling, let the apple mixture sit for 15-30 minutes. The sugar will draw out some of the apple juices, creating a head start on your sauce. If a lot of liquid accumulates, you can drain some of it off and reduce it on the stovetop for a more concentrated flavor, then add it back to the apples.
Assembly and Baking: Bringing It All Together
The final steps bring your apple pie to life.
- Roll the Bottom Crust: On a lightly floured surface, roll out one chilled dough disc into a 12-inch circle, about ⅛-inch thick. Carefully transfer it to a standard 9-inch pie plate. Trim the edges, leaving about a ½-inch overhang.
- Fill the Pie: Spoon the apple mixture into the pie plate, mounding it slightly in the center. Dot the top of the apples with small pieces of butter.
- Add Top Crust: Roll out the second dough disc for the top crust. You can either place it directly over the filling, cut slits for steam vents, or create a beautiful lattice top for a more decorative finish.
- Seal and Crimp: Trim the top crust, leaving a ½-inch overhang. Fold the top crust overhang under the bottom crust overhang and crimp the edges together firmly to seal the pie.
- Bake: Preheat your oven to 425°F (220°C). For a golden crust, you can brush the top with an egg wash (one egg beaten with a tablespoon of water) and sprinkle with a tablespoon of granulated sugar. Bake for 15-20 minutes at 425°F, then reduce the temperature to 375°F (190°C) and continue baking for another 35-50 minutes, or until the crust is deeply golden brown and the filling is bubbling thickly. If the edges start to brown too quickly, loosely tent the pie with aluminum foil.
- Cool Completely: This is arguably the most important step! Allow the pie to cool on a wire rack for at least 3-4 hours, or ideally, completely to room temperature. This allows the filling to set properly, preventing a runny slice.
Tips for Apple Pie Perfection: Beyond the Basics
*
Preventing a Soggy Bottom:
* Ensure your crust is well-chilled before baking.
* Pre-bake or "blind bake" the bottom crust for 10-15 minutes before adding the filling, especially if your recipe includes juicy fruits.
* Bake on the lowest rack for the last portion of baking to get direct heat to the bottom.
* Add a sprinkle of crushed cornflakes or finely ground graham crackers to the bottom of the crust before filling to create a moisture barrier.
*
Crust Browning: If your crust is browning too quickly, create a foil collar to protect the edges, or gently tent the entire pie with foil.
*
Adjusting Sweetness: Taste your apples! If they're particularly sweet, reduce the sugar in the filling. If they're very tart, you might need a bit more.
*
Serving Suggestions: Apple pie is fantastic on its own, but it's often best served warm with a scoop of vanilla bean ice cream, a dollop of fresh whipped cream, or even a slice of sharp cheddar cheese for a classic pairing.
*
Storage: Covered at room temperature, apple pie will last for 2-3 days. For longer storage, refrigerate for up to 5 days, or freeze baked pie (well-wrapped) for up to 3 months. Reheat gently in the oven.
Conclusion
Baking a homemade apple pie is a timeless tradition that brings immense joy and satisfaction. By understanding the role of each ingredient, employing careful techniques, and adding your own personal touch, you can master this iconic dessert. The journey from humble ingredients to a golden, bubbling masterpiece is a rewarding one, culminating in a culinary creation that will gather loved ones, spark conversation, and fill your home with an irresistible aroma. So, roll up your sleeves, embrace the process, and prepare to delight in the flaky crust and perfectly spiced filling of your very own, perfect apple pie. It’s more than just dessert; it’s a taste of home.